Nowadays videos are the preferred content format for acquiring information. Every freelancer should learn how to edit videos. TikToks and YouTube Shorts are the most popular types of video among users. Also, videos have become a part of our daily life. Even if you don’t plan to work in video editing, learning how to edit videos is crucial. It’s an especially effective technique to advertise your freelance work on social media and create material for clients.
Selecting the correct video editing software is important to learning this talent. Although there are numerous video editing softwares available, we will see why this editor is good for freelancers.
For both beginners and experienced users, Movavi Video Editor is a great option. It is an amazing choice for anyone looking to quickly and simply create high-quality video content because of its user-friendly interface, wide variety of functions, and reasonable price.
What Is Movavi Video Editor ?
Video editing is becoming a new trend nowadays. There are multiple softwares available, here we will talk about Movavi Video Editor. It has been in business since 2004 and takes pride in being effective and easy to use. In addition to standard video editing tools, it uses artificial intelligence (AI) to make editing less complicated. t The main focus of this software is to make your tasks easier, but we’ll talk about those features later. A larger software suite that also includes Movavi Photo Editor, Slideshow Maker, Screen Recorder, and more includes Movavi Video Editor.
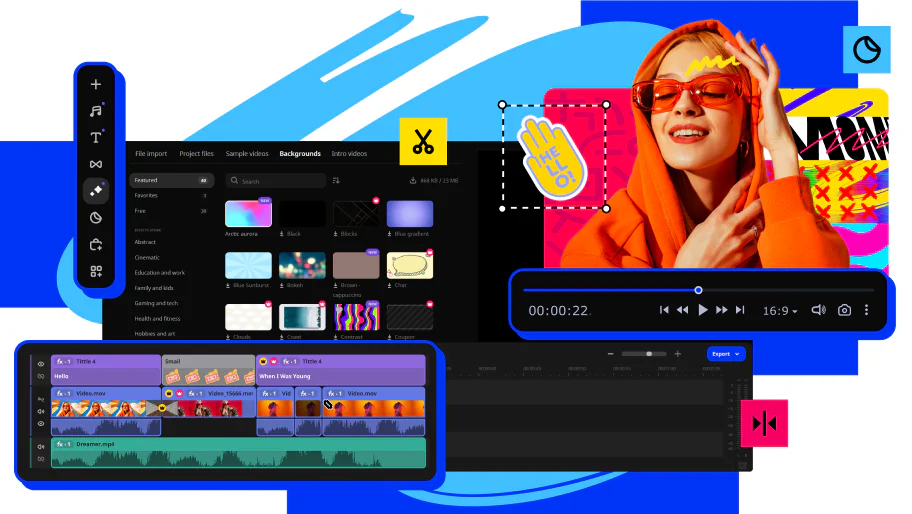
Movavi Video Editor is a feature-rich program that includes every tool you need to create videos of the highest caliber. What’s greatest about this software is that even someone without any experience with video editing may use it with ease. but also offers cutting-edge technologies to assist experts in creating videos of Hollywood caliber.
How to Download Movavi Video Editor?
Your videos will be transformed by the simple yet powerful Movavi video editor. Videos may be edited and converted, audio tracks can be added, 3D effects can be created, unstable footage can be fixed, and more. Moreover, You may edit videos, add music, and create special effects with this application. Movavi Video Editor can be downloaded for free, or you can purchase a subscription to gain lifetime access to this video editor and all of its features. Here is how you can install it.
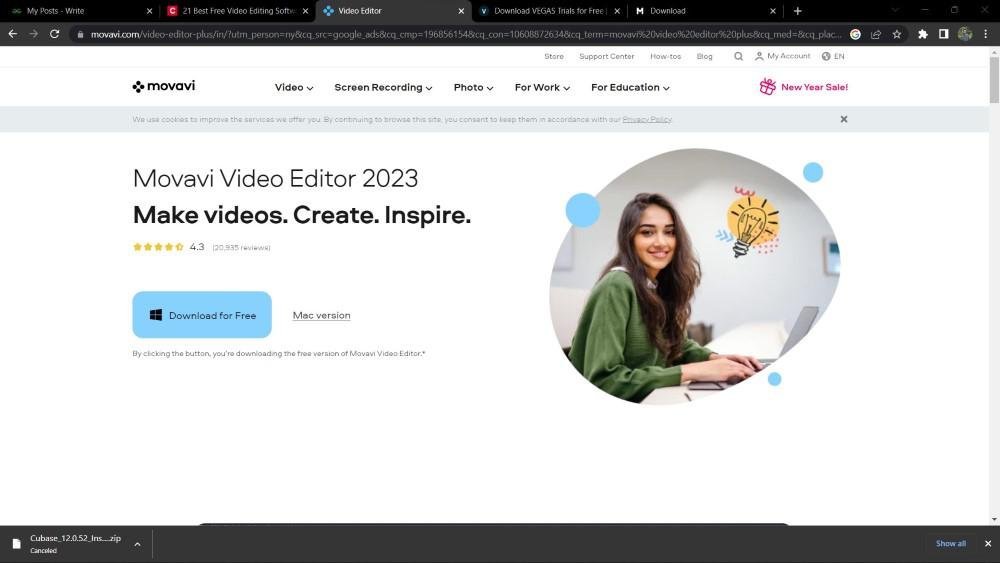
- Click the link below to download the Movavi Video Editor
.exefile for Windows:
Download Movavi Video Editor - Once the download is complete, locate the downloaded file in your system.
- Open the downloaded file and follow the prompts. The first step is to review and accept the End User License Agreement.
- Select the desired folder for installation or keep the default location, then click the “Install” button to proceed.
- The installation process will begin. It may take around 5 minutes to complete.
- Once the installation is finished, the Movavi Video Editor will be ready for use.
How much does the Movavi video editor cost?
To meet the demands of different user groups, Movavi Video Editor has different price tiers. Basic access and complete packages with cutting-edge features are among the options available.
A single Purchase: Movavi Video Editor 2024 can be purchased for $79.95 once.
Membership Plan: Movavi Video Editor, Movavi Video Suite, and Movavi Unlimited are also available for $54.95, $94.95, and $155.95, respectively, for a one-year subscription.
Without Pay Trial: Before making a purchase, you may test out Movavi Video Editor’s features for free. Please be aware, nevertheless, that a “Trial” watermark will appear on your output video. Additionally, you can only export half-hour audio or 60-second video. Furthermore, several sophisticated functions are not accessible.
How do I start using Movavi Video Editor?
The user interface of Movavi Video Editor ought to be used as a model for designing editing interfaces. It has the appearance of a conventional video editor and is smooth and tidy. You aren’t overloaded with stuff. It is felt that UI of Movavi Video Editor is exceptional. One of the main factors contributing to this video editor’s current popularity is its user interface.

Steps For Editing:
As previously said, the UI makes modifying audio and video files easy. You must follow these procedures in order to make simple edits:
- Uploading the audio or video clips you want to edit should be your first step. To accomplish this, select the Add Files button that appears on the screen.
- After uploading the clips, use your mouse to drag them on the timeline.
- Use the editing tools that appear directly above the timeline to carry out editing tasks including cutting, cropping, adding markers, splitting, and combining a video.
- Additionally, a large selection of stickers, titles, overlays, filters, transitions, and audio effects are available.
- Drag an element that you like into the clip’s timeline segment where you want to apply the effect.
- After editing is complete, just click the Export option to save the final altered clip to your computer.
What are the Key Features of Movavi Video Editor:
Numerous other tools that can improve and fix your audio and video footage can be found around the bottom of your left-hand-side toolbar.
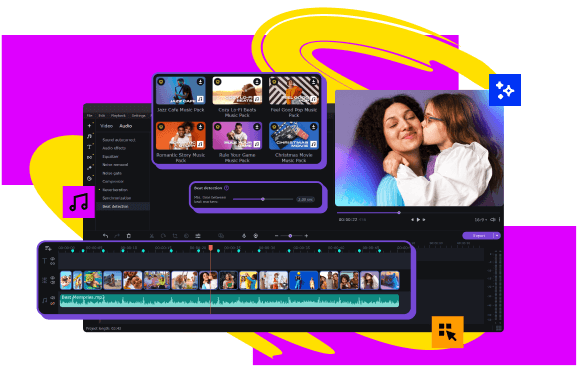
1. Color Modifications:
With a simple click, Movavi Video Editor gives you plenty of options to improve and adjust the colors in your footage.
2. Zoom and Pan:
You can also control how a clip shows on the screen with only one click. You can choose whether it appears from left to right, top to bottom, or the opposite. Additionally, you can zoom in or out as desired.
3. Positioning of Clips:
It is also possible to adjust the clip’s position in Movavi Video Editor. For gamers and other independent video producers, the picture-in-picture mode is an excellent choice.
Additionally, you can place your clip as a logo, on the top or bottom of a screen, on the right or left side, or in the middle, left, or right triangle.
4. Highlight or Hide:
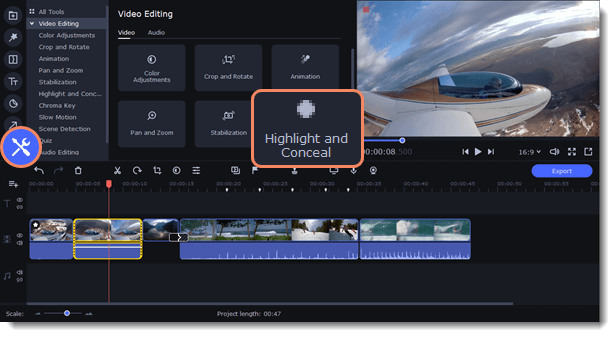
You will be able to mask things on the clip in this part. The mask can have a black rectangle and eclipse or it can have clear, bright, pixelated, or blurred images. The applied mask’s outline, opacity, and feathering can all be changed.
In addition, you can set up some motion-tracking guidelines here. The tracking can be configured to be AI-based, fast, or accurate. I was astounded by the tool’s motion-tracking capabilities. In my film, the AI in particular did a fantastic job of tracking a moving object.
5. Maintaining Stability:
This is an excellent tool for handling a shaky camera. By modifying the shaking and accuracy settings, you can steady the video. Even the strongest shakes can be lessened using this tool.
6. Animation:
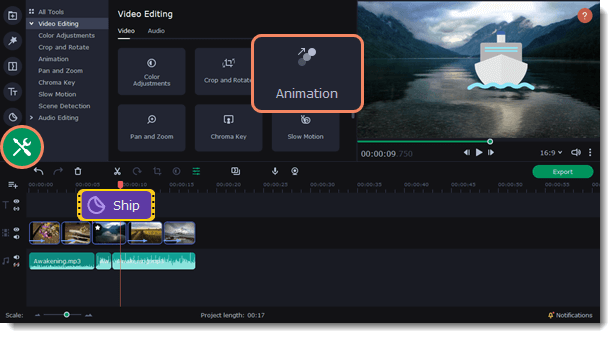
This tool will make it easy for you to animate specific parts of your footage. You may also find keyframe editing options here. The keyframe can be used to precisely tell the user where the impact should begin and finish on the timeline. The animated element’s size, opacity, rotation, and position can all be changed by users.
7. Analyzing Scenes:
When a scene in a video changes, the editor automatically recognizes it and instantly splits the scenes according to those changes. To enable the editor to recognize and split a modified scene automatically, you can set the scene’s minimum duration.
8. The Chroma Key:
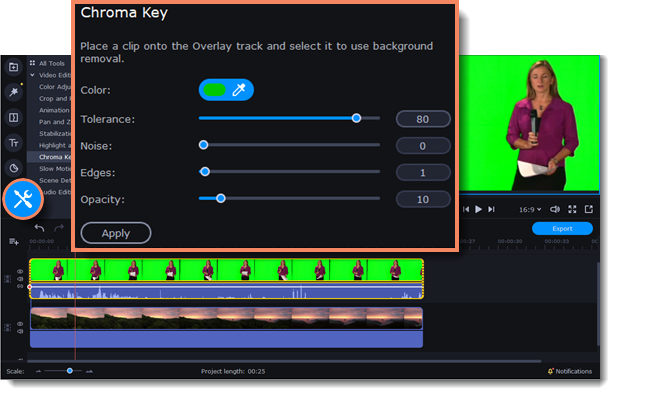
The majority of independent video makers are going to love this additional capability. You get a dropper that allows you to select any color you want to use for the background of your film, even if it starts with green. To improve the effect, you can also change your background’s opacity, edges, noise, and tolerance once it has been established.
9. Slow Motion:
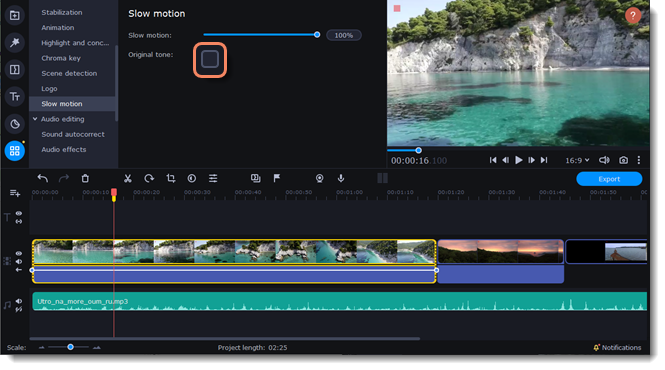
Furthermore, Movavi Video Editor excels at allowing you to change the clip’s speed. To adjust the speed of the clip from 10% to 100%, move the slider in the editor’s slow-motion section.
By right-clicking the clip’s portion on the timeline and choosing the “Freeze Frame” option, you can also rapidly add a freeze-frame to your clip.
10. AI Noise Elimination:
Additionally, the AI can identify undesirable sounds in your video and automatically eliminate them to improve its quality. It provides you with a clearer audio clip because it is quite accurate at picking up background noises like wind, racing cars, and other similar factors.
How to use Movavi Video Converter to convert video files ?
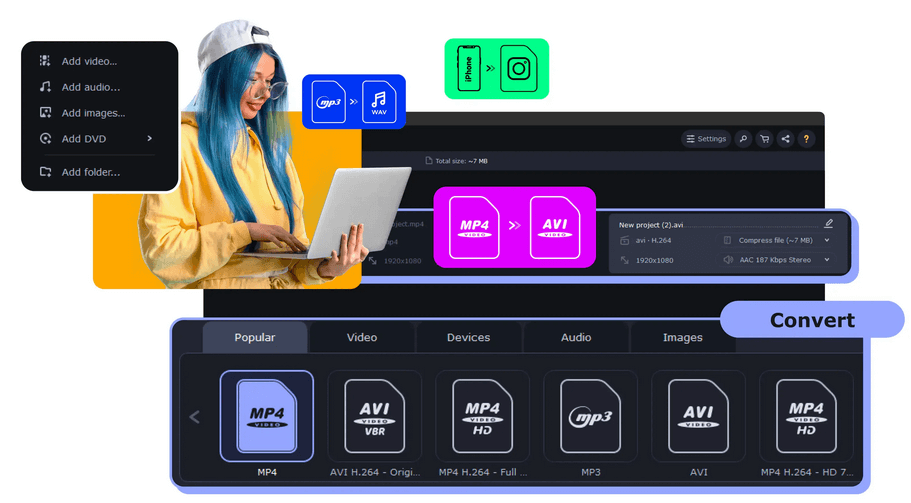
Here’s how to modify a video’s format:
Step 1: Install the app after downloading it.
Step 2: Include a file in the application. Simply choose Add Video after clicking Add Media. Find the file or files you wish to convert on your hard drive, then click Open to add them to the conversion queue.
Step 3: Select a different format. Select the video’s preferred output format in the interface’s lower section. You can explore the Video, Devices, and Audio tabs or use the search box to find the relevant preset.
Step 4: Optionally compress the video. Click on the file size value to decrease the output file’s size. The application will then modify the bitrate to attain the specified size after you make any necessary adjustments to the File size slider. To compress a portion of your video and see the outcome, click Convert sample.
Step 5: Make optional edits to your video file. Numerous editing possibilities are available with Movavi Video Converter. Press Edit and make use of the necessary tools. Unwanted portions can be removed using the Trim tab. You can select a filter for your video under the Effects tab. To upload a subtitle file from your computer or to download subtitles from the Internet, select the Subtitles tab. After making the required adjustments, click Save and Close.
Step 6: Begin the conversion. To begin the encoding process, click Convert in the lower right corner. The output file’s folder will open automatically when the file is ready.
Fantastic! You now understand how to modify a video’s format.
How Does the Screen Recorder Function Works in Movavi Video Editor?
Movavi Screen Recorder allows you to record any window, screen, or tab on your computer. With a single click, you can record video as well as outside audio. This small yet capable video recording program works on both Macs and PCs. Whether you want to record just one thing or everything, Movavi Screen Recorder will do the task for you.
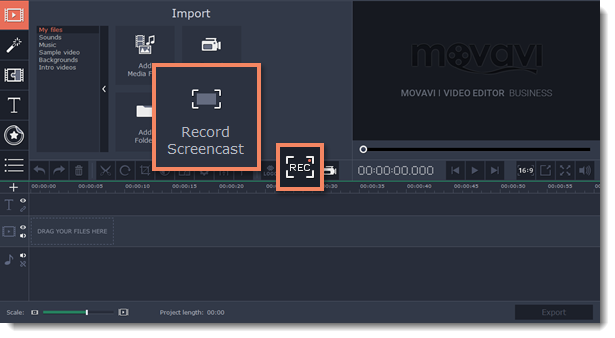
How to capture the screen of a Windows PC ?
When you play online games on your PC, do you wish to share pictures or videos of your screen? Windows 10 and 11 come with a customized screen-recording tool called Game Bar that makes it simple to record screen activity other than video games.
The steps to capture your computer screen are as follows:
Step 1: To record the screen of a Windows machine, press the Windows logo key + G. Game Bar will open as a result. You must hit the Xbox button on your controller if you have an Xbox 360 or Xbox One controller connected to your computer.
Step 2: Click Start recording in Windows 10 to record your computer screen. PC game recordings can be started and stopped by pressing the Windows logo + Alt + G.
Step 3: To take a snapshot of what’s happening in the game, click the camera icon.
Step 4: Press the Stop recording button to end the computer screen capture. Choose If you wish to edit a clip you recorded, check out my captures.
What are The Advantages of Movavi Video Editor?
- An easy-to-use interface for beginners
- AI-noise reduction, stabalizing, chroma key, and other cutting-edge tools
- Many options for effects, filters, and templates
- Making and sharing films on social media is simple.
- Fast 4K video processing speeds
- Voiceovers can be recorded straight from the program.
- Reasonably priced plans that include lifetime licenses.
Is Movavi cost-free?
The good news is that Movavi is free to download and use. On your Mac or Windows computer, navigate to their website and select the “Download for Free” option. Nevertheless, there are restrictions when utilizing Movavi’s free edition. These include of duration limits on your recordings, watermarks on your exported material, and limited access to some of the more sophisticated capabilities of the program. Although it’s not the best option, the free edition of Movavi is a fine starting point if you want to test it out before spending any money.
Is it safe to use Movavi?
- Is Movavi secure? The response is Yes. There are no harmful or dangerous files in the Movavi software, and it is lawful.
- The majority of Movavi’s programs are available for free, however in order to access the most sophisticated features and functionality, a paid license is necessary.
- As all other e-commerce websites, Movavi’s payments are secure and protected. Therefore, you may make purchases via Movavi’s official website without worrying about scams or unauthorized use of your credit card.
- Similar to a number of other sites, Movavi uses cookies to enhance its services. Cookies enable websites to gather anonymous session data. You can exit the website if you do not want it to gather info on you.
FAQs:
Every common video and audio format is supported by Movavi Video Converter, including AVI, MP4 (MPEG-4), MOV, 3GP, FLV, MKV, WMV, MP3, WAV, and more.
In addition to changing a video’s format and reducing its size, Movavi Video Converter may be used for a variety of additional purposes. The application can be used, for instance, to lower the resolution of videos.
Movavi provides a free trial with restricted functionality and a video watermark. You must buy the software if you want to use all of its capabilities without any watermarks.
One Movavi license can only be installed on a single computer. Products from Movavi are licensed per machine rather than per user, website, or business.
Conclusion:
Videos are the main source of information and entertainment in the modern world. Learning how to edit videos is crucial for freelancers, particularly those who produce material for websites like YouTube Shorts and TikTok. Knowing how to edit movies is useful for both personal projects and advertising freelancing work, even outside of the realm of professional video editing. Learning how to edit videos is made easier by using the appropriate program, like Movavi Video Editor. Movavi is a great option for both novices and experts due to its harmony of sophisticated features and easy-to-use tools. Don’t forget to check out The Best Video Editing Software for Beginners




[…] Movavi is a software for editing videos that is easy to use in post-production. This is a great choice for YouTubers who want to use more creativity in their videos but don’t want to invest in expensive editing software. You can begin editing in a matter of minutes because the primary window contains all the tools you’ll need. It helps with trimming, cropping, and combining in addition to providing some sophisticated features like color correction, AI background removal, noise reduction, slow motion, animation, audio enhancement, and much more. The fact that all Movavi software is safe to use is the best thing. It can’t in any way damage your device or privacy because it doesn’t include any malware.For more details check out the article Movavi Video Editor: Your Go-To Tool for Simple Video Editing […]